Save and Export
You can either save or export your projects. Saving a project will create a .pxo file, which is Pixelorama's custom file format, while exporting means that one (or multiple, in case of animations) .png(s), an .apng, or a .gif file will be created.
Basically, you should save your project if you intend to use it again on Pixelorama and keep all of your data, such as layers, project brushes, animation tags, etc. While, if you want to share your artwork, import it in another software such as a game engine, or view it on an image editor, you should export it. Of course, nothing is stopping you from doing both, which is actually the recommended approach.
Saving

To save a project, you can go to the File menu and select Save.., or press Control + S, and a window will appear. If you are using a Desktop version, you will be able to choose where you want the file to be saved. If you use the Web version, you will be asked for a file name and the .pxo file will be downloaded by your browser.
By selecting Save... again on a project you have already saved, the file name and path you chose before will still be automatically used, which means that the old file will be replaced with a new one with the changes you have made. If you'd like to save a different file, you have to use the Save as... option, or press Shift + Control + S.
Exporting
To export your project, you can go to the File menu and select Export..., or press Control + E, and a window will appear. If you are using a Desktop version, you will be able to choose where you want the file to be saved. If you use the Web version, you will be asked for a file name and the .png, .apng or .gif file(s) will be downloaded by your browser.
Just like with save, you have to use the Export as... option or Shift + Control + E to export to a new directory.
You can choose what you want to export by clicking on one of the tabs on the top of the window.
If you draw on a small canvas, the exported image will have a relatively slow resolution. Some software and websites tend to blur small images, which can make pixel art look bad. To avoid that, you are also given the option to resize on export, with a chosen interpolation method. This is useful when you want to share your art and make it easier for people to preview it. For most cases, sticking with the default Nearest interpolation should be fine.
You can choose which frames you want to save by changing the "Frame" option below the preview. The default setting is to include all frames, but you can set it to only include the currently selected frame, or select specific tags. Similarly, you can select which layers you want to include by changing the "Layers" option. You are also given the option to select the animation direction from either forward, backward or a ping-pong loop.
Export a sequence of images

By default, the export window is set to export a sequence of images, one for each frame, either as multiple files, or as a single animated file, if the file format is set to an animated image format, such as .gif or .apng.
If you save your animation as multiple files, then every file will have a number attached to its name. For example, if the name is filename.png, the exported file names will be filename_0001.png, filename_0002.png, filename_0003.png and so on. In the advanced options, you can find options to change the separator character(s) (in the above example, the character is the underscore (_), which is also the default). If these frames also have a frame tag, the name of the tag can be included in the file name as well, by enabling "Include frame tags in the file name". You can also choose to automatically create a new directory for each frame tag for extra organization, by enabling "Create new folder for each frame tag". This will place all of the frames of the same tag in a different directory.
Keep in mind that if you are working with a large canvas size and/or multiple frames, the .gif exporting process can be slow. Until we speed up the process, it is recommended to export to .apng and use another tool, such as https://ezgif.com/apng-to-gif, to convert the .apng file to .gif.
Export a spritesheet

You can save the entire animation as a single image containing all of the frames. This is called a spritesheet. You can choose how many rows and columns you want your animation to be split into, in the spritesheet. Spritesheets can also be imported into Pixelorama.
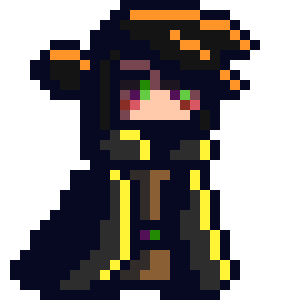
The above project exported as a gif file with Pixelorama
Export a video
You can also export to various video formats. The process is similar to exporting a sequence of images, but Pixelorama is not able to export to video by itself. For this, you need FFMPEG. All you have to do is download it if it's not already installed, and then find its executable path and copy it inside Pixelorama, in Edit>Preferences>Startup>FFMPEG. If you have FFMPEG in the PATH environment variable of your Operating System, you can just put "ffmpeg" in the text field in the Preferences, instead of copying the path. Otherwise, make sure to include the entire path to the executable. For example, on Windows, it needs to look something like this: [path_to_ffmpeg]/bin/ffmpeg.exe.